If you have added a student to an internal exclusion by mistake or the exclusion is no longer required, you have a couple of options for how to remove them.
Permissions
You will need the permission Student: Behaviour: Administer All Students or Student: Behaviour: Administer My Students. If you don't have the permission, you'll need to ask your admin team to give you permission using these instructions.
From the behaviour area
To remove a student from an Internal Exclusion, go to Students > Behaviour > Internal Exclusions and select the internal exclusion.
Click More information in the slide over.

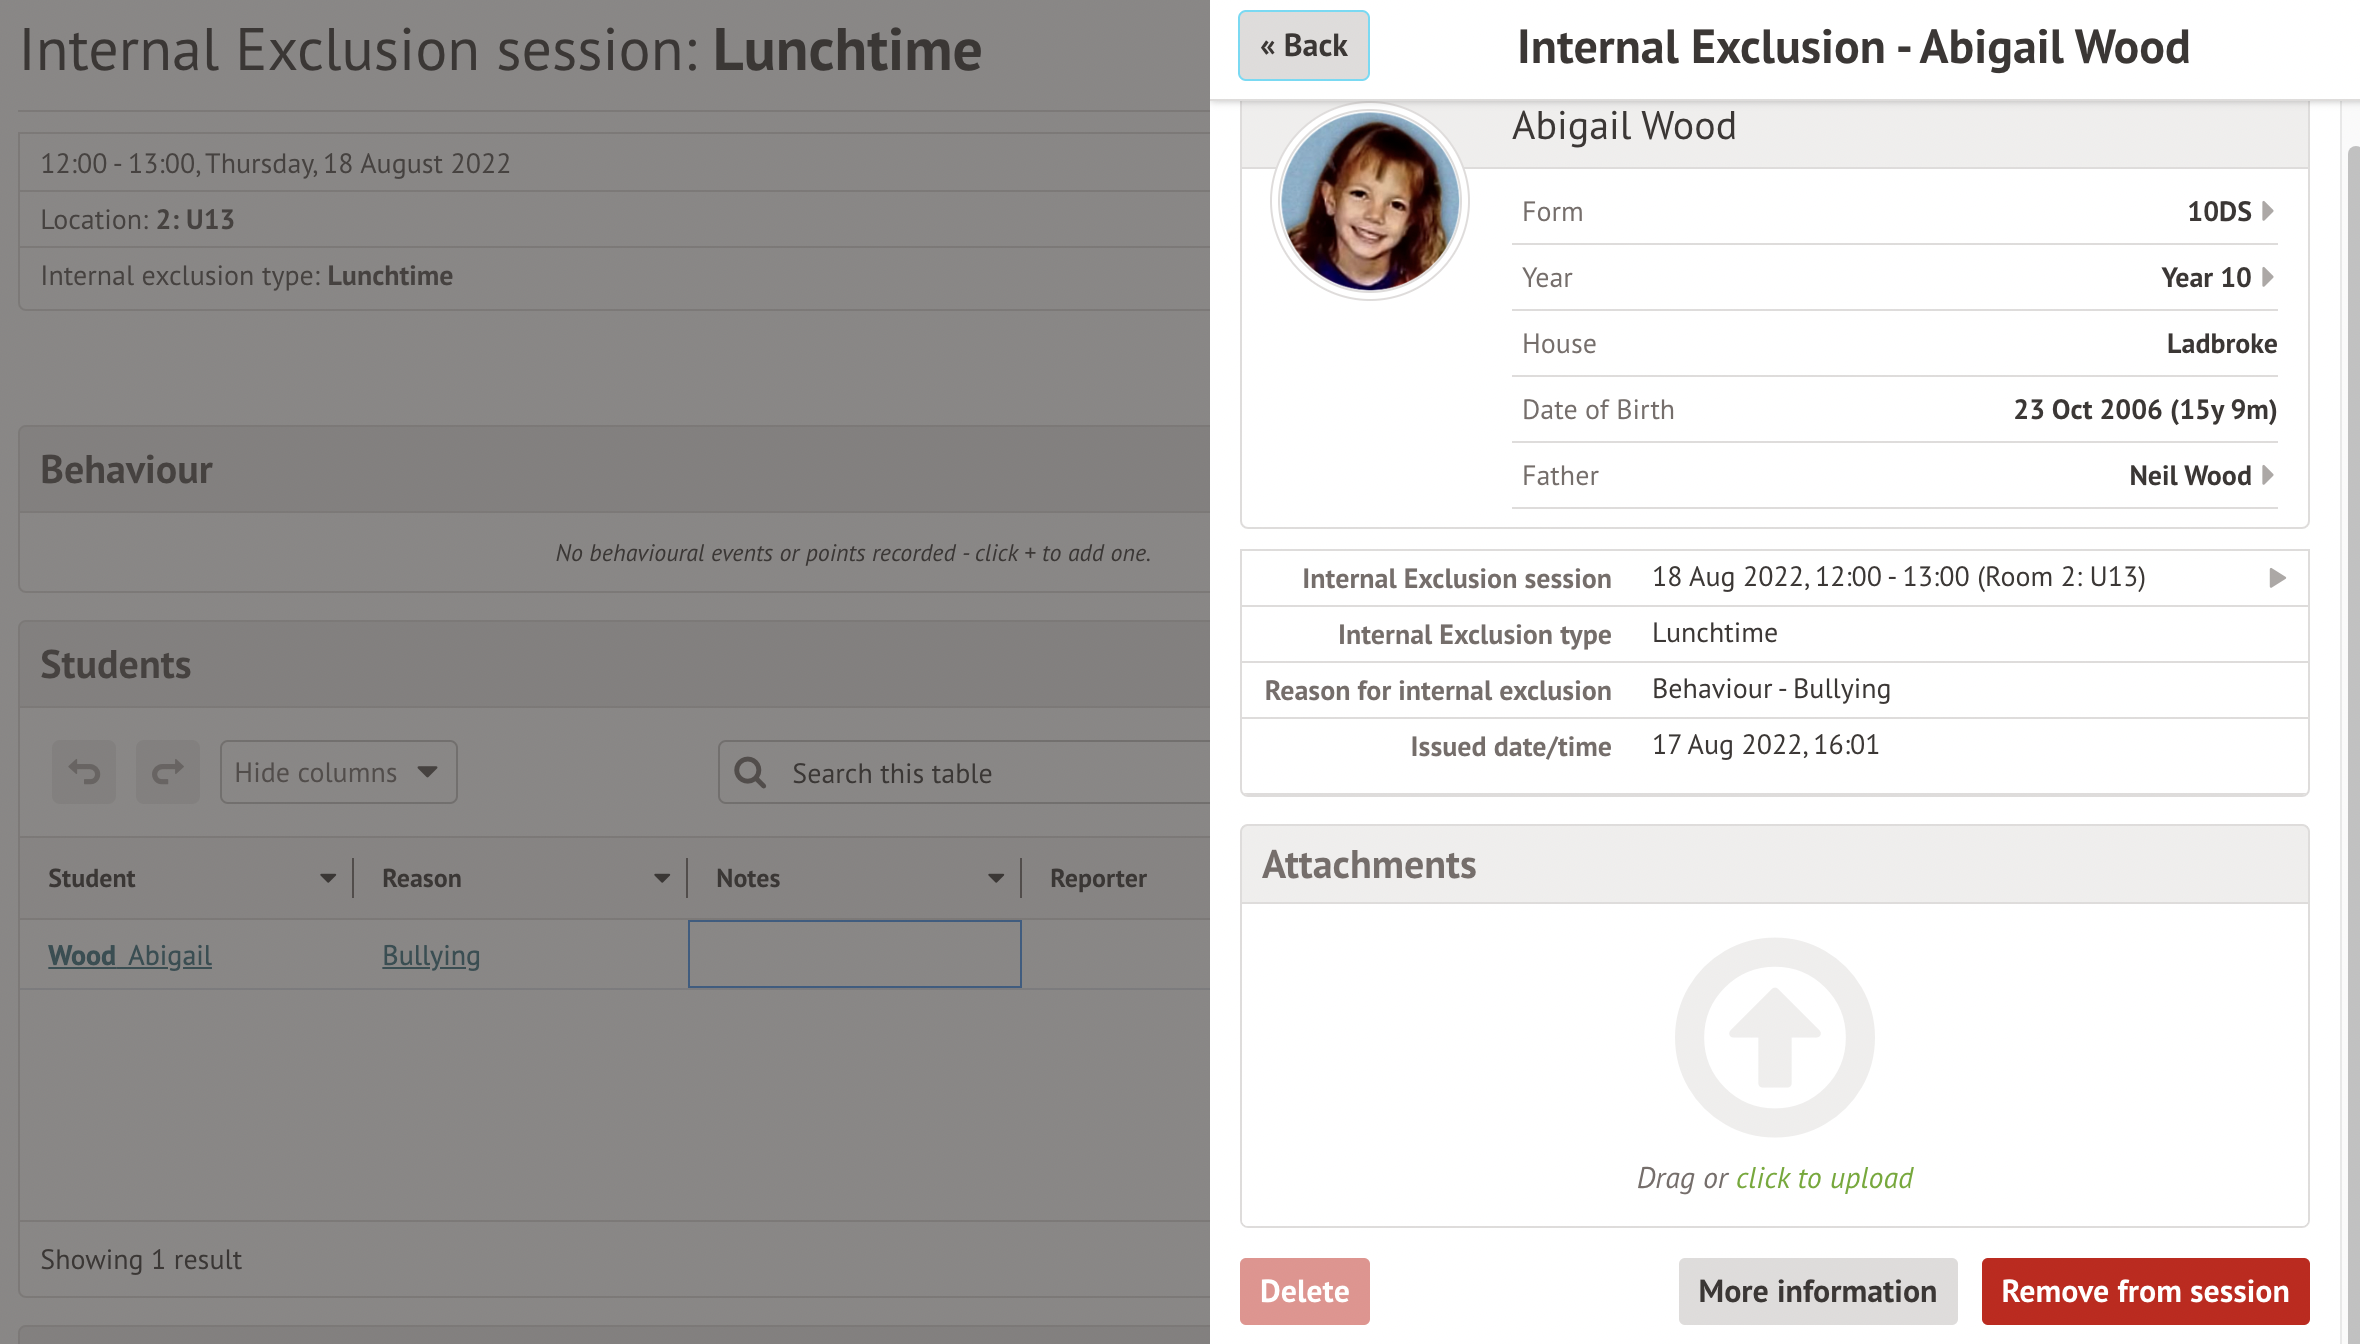
Click the student to remove, then scroll down to the bottom of the slide over and click Remove from session.

If attendance has been taken for an internal exclusion, the Remove from session button will not be clickable. To remove the student, you'll first need to remove the attendance mark recorded.

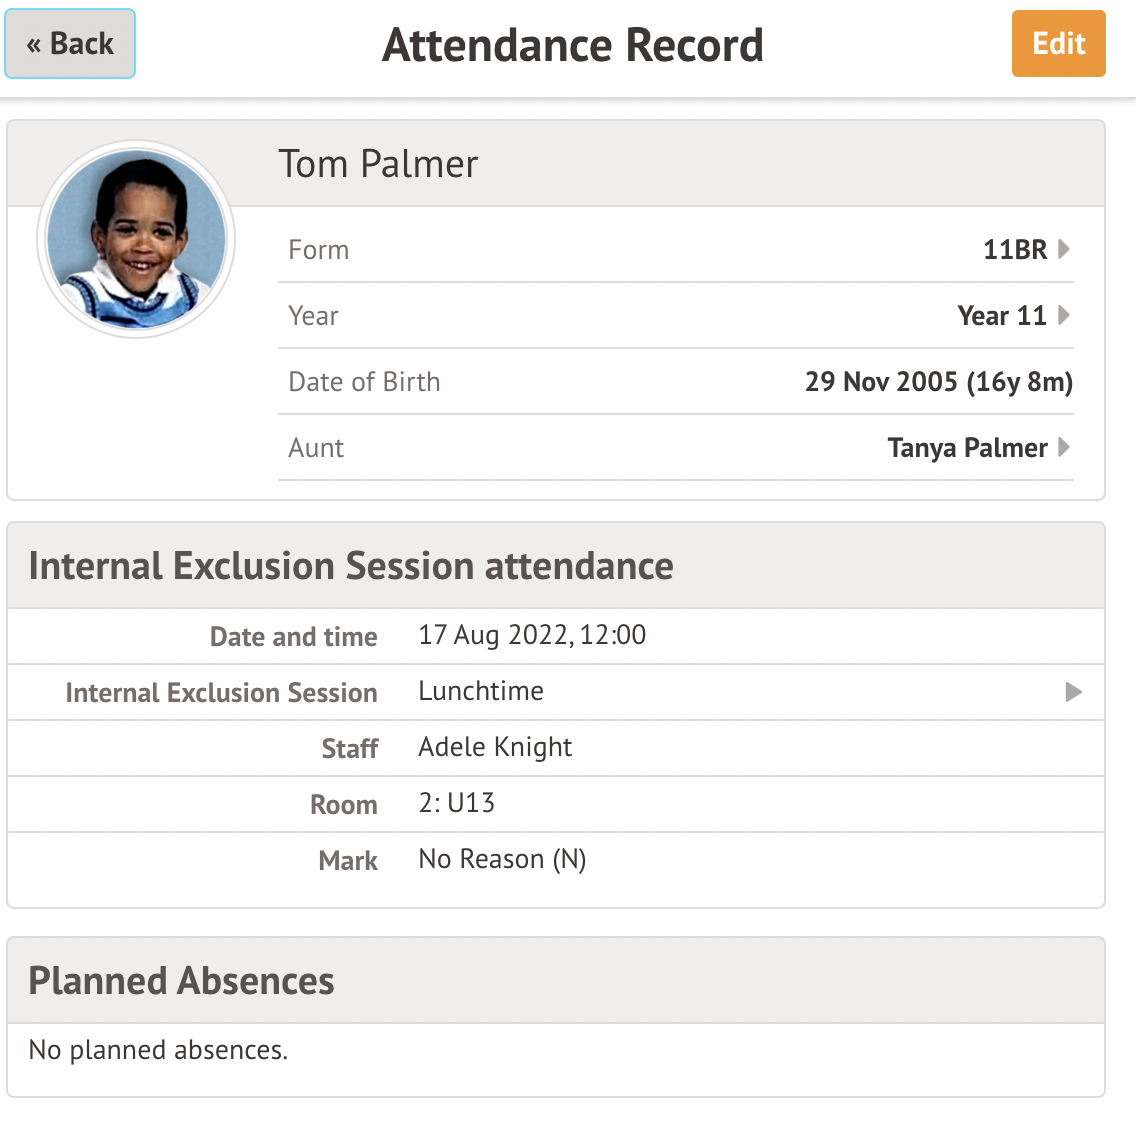
Click on the attendance mark given to the student. Click Edit in the slide over.

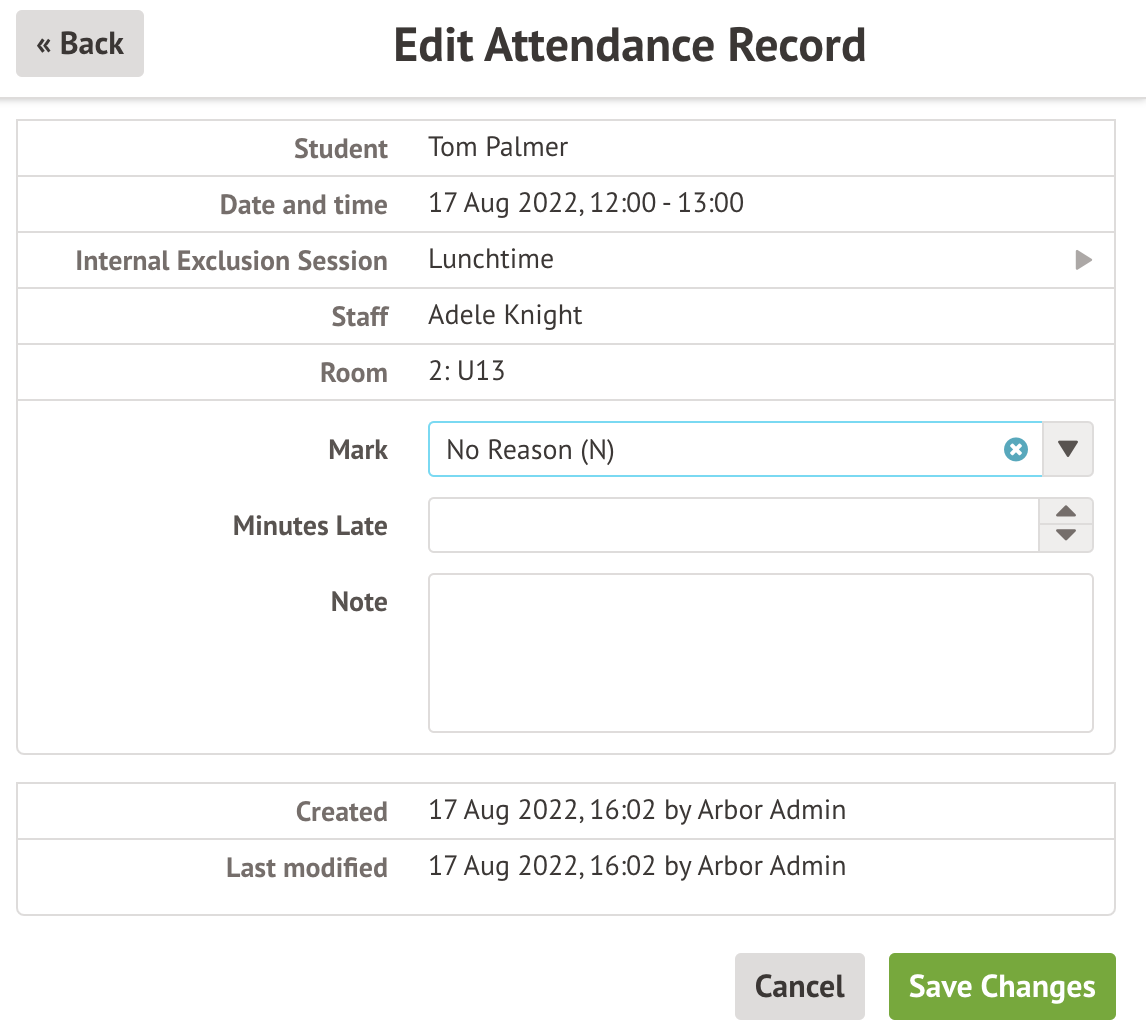
Click on the x to remove the Mark and Save Changes.

Once you have removed the attendance mark click on the student name and the Remove from session button at the bottom of the slide-over.

From the student profile
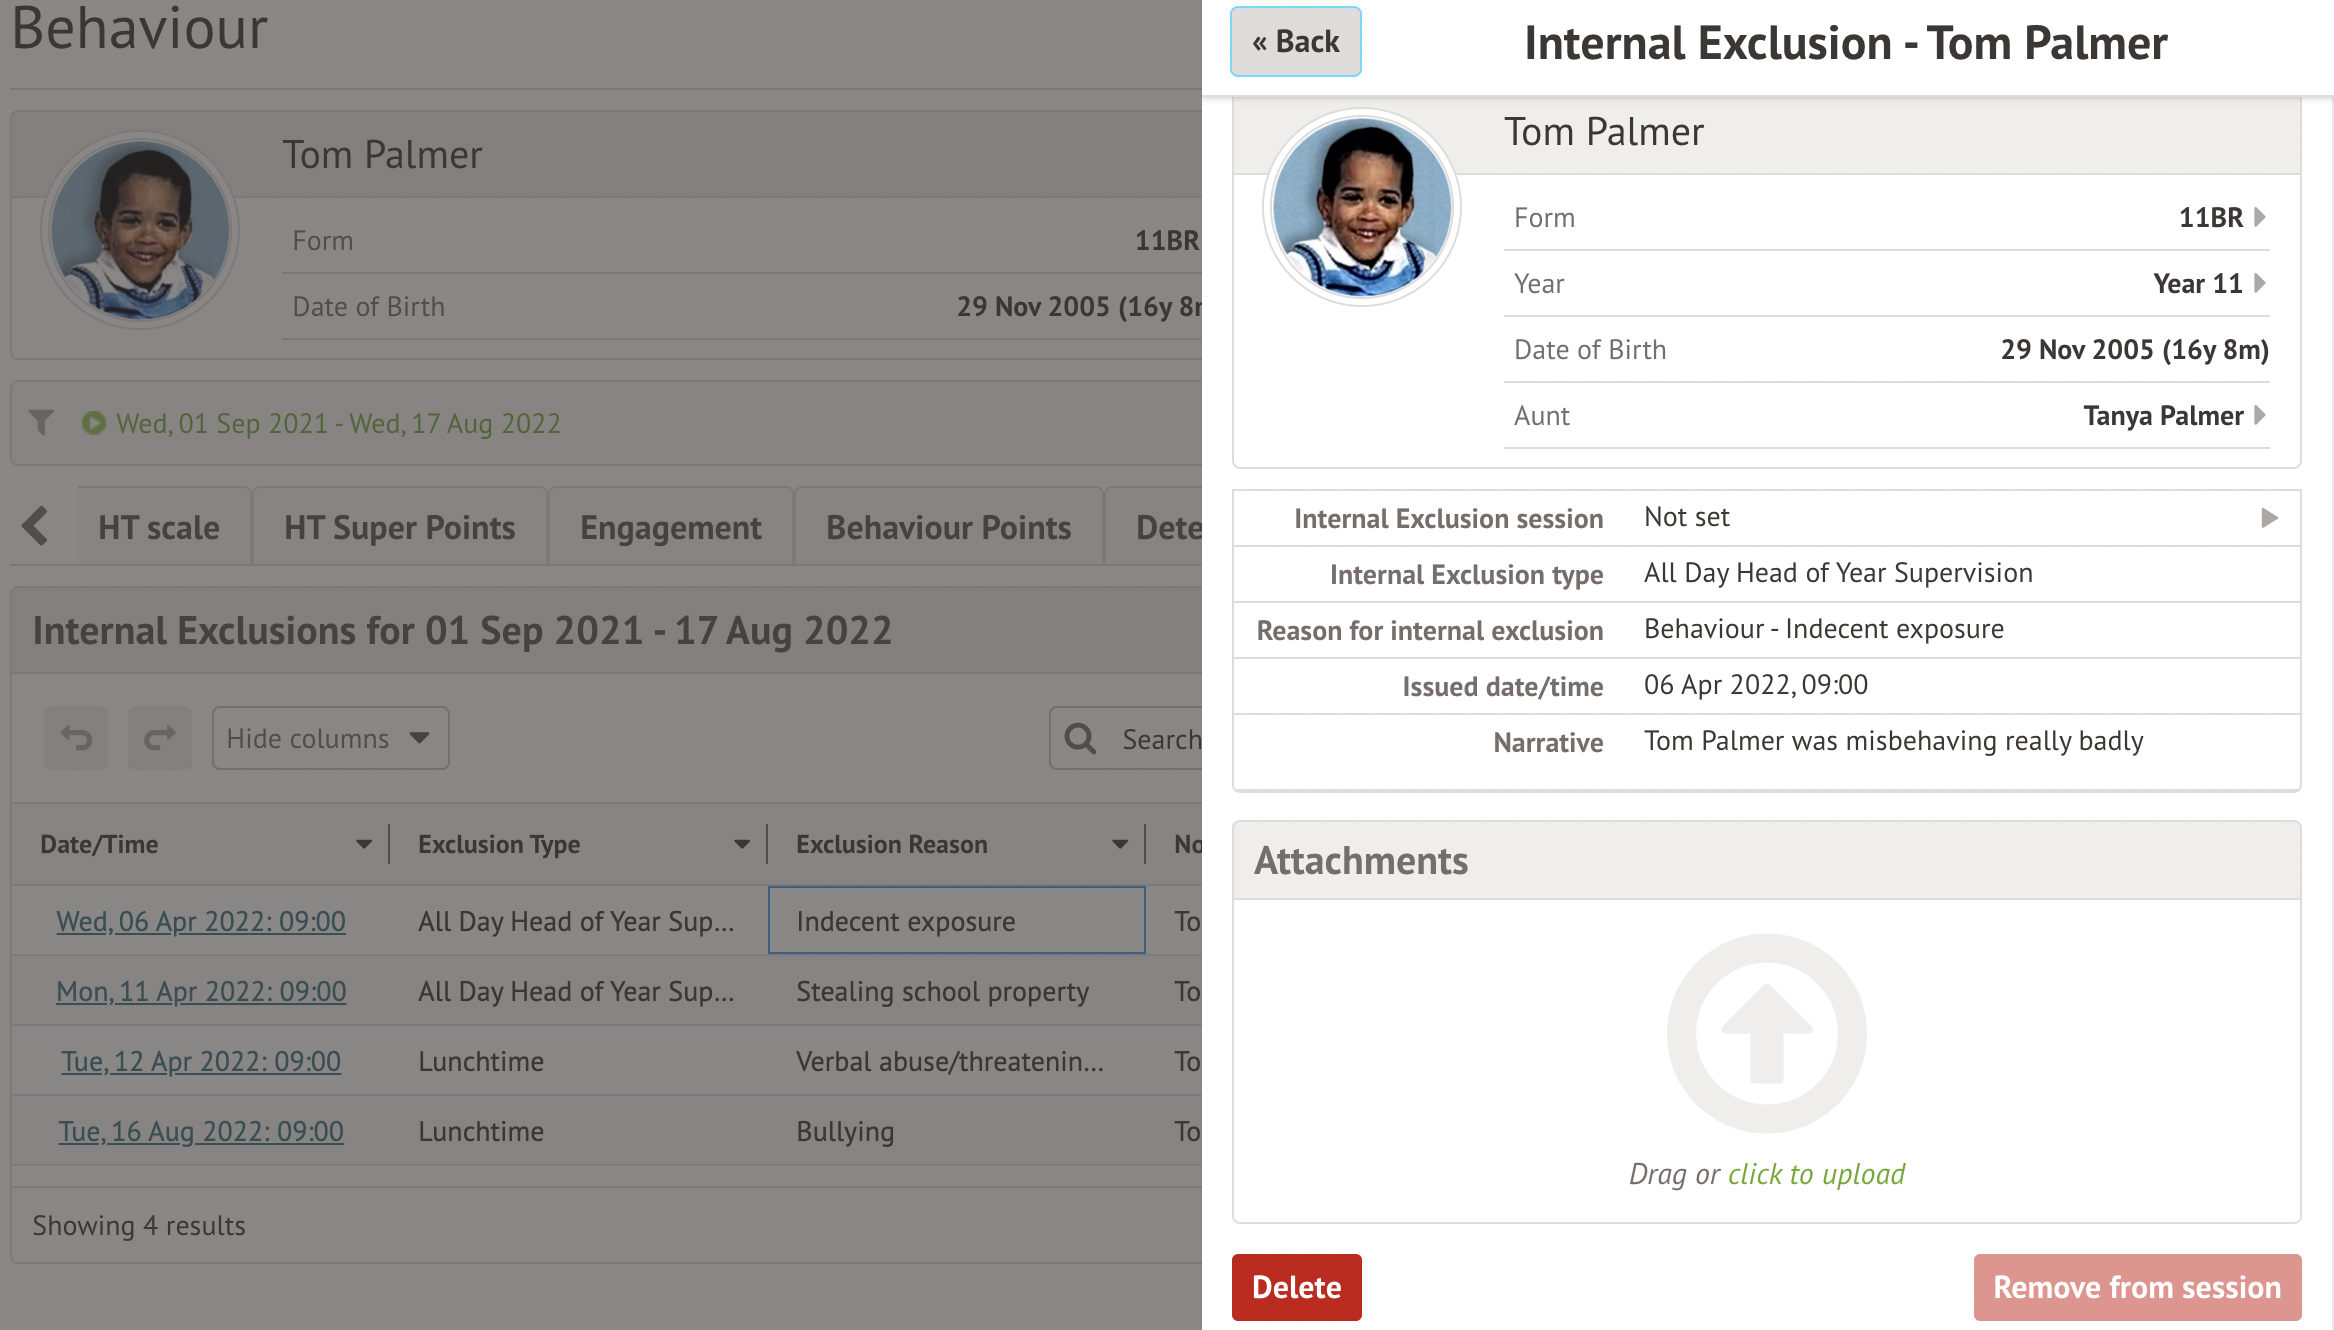
First, navigate to the student profile using the search bar in the top right-hand corner of your screen. On the left-hand side of your screen, click on Behaviour and then on the Internal Exclusions tab.
From the list of Internal Exclusions, click on the session you wish to remove the student from. On the slide over, click on the red Remove From Session button.

Comments
Article is closed for comments.