Document Manager is a central place in Arbor where you can find and manage all documents that have been uploaded into Arbor.
You can use it in two ways:
- From the Document Manager page, where you can view, search, filter, and manage documents linked to students, guardians, staff, and wider school activities, all in one place.
- From an individual student or staff profile, where you’ll only see the documents uploaded to that person’s profile, with the option to manage them in bulk if needed.
Permissions
To view the central Document Manager, you’ll need the following permission:
- School: Documents: Administer
To view the Document Manager on a student profile you’ll need:
- Student Profile: Identity: View All Students
To view the Document Manager on a staff profile, you’ll need:
- Staff Profile: All Staff: Basic HR Administration
Please note: documents in Arbor always inherit the permissions of the record they’re attached to. For example, if a document is uploaded to a student’s medical event, you’ll only be able to see it if you have one of these permissions:
- Student Profile: Medical: View All Students
- Student Profile: Medical: View My Students
Centralised Document Manager
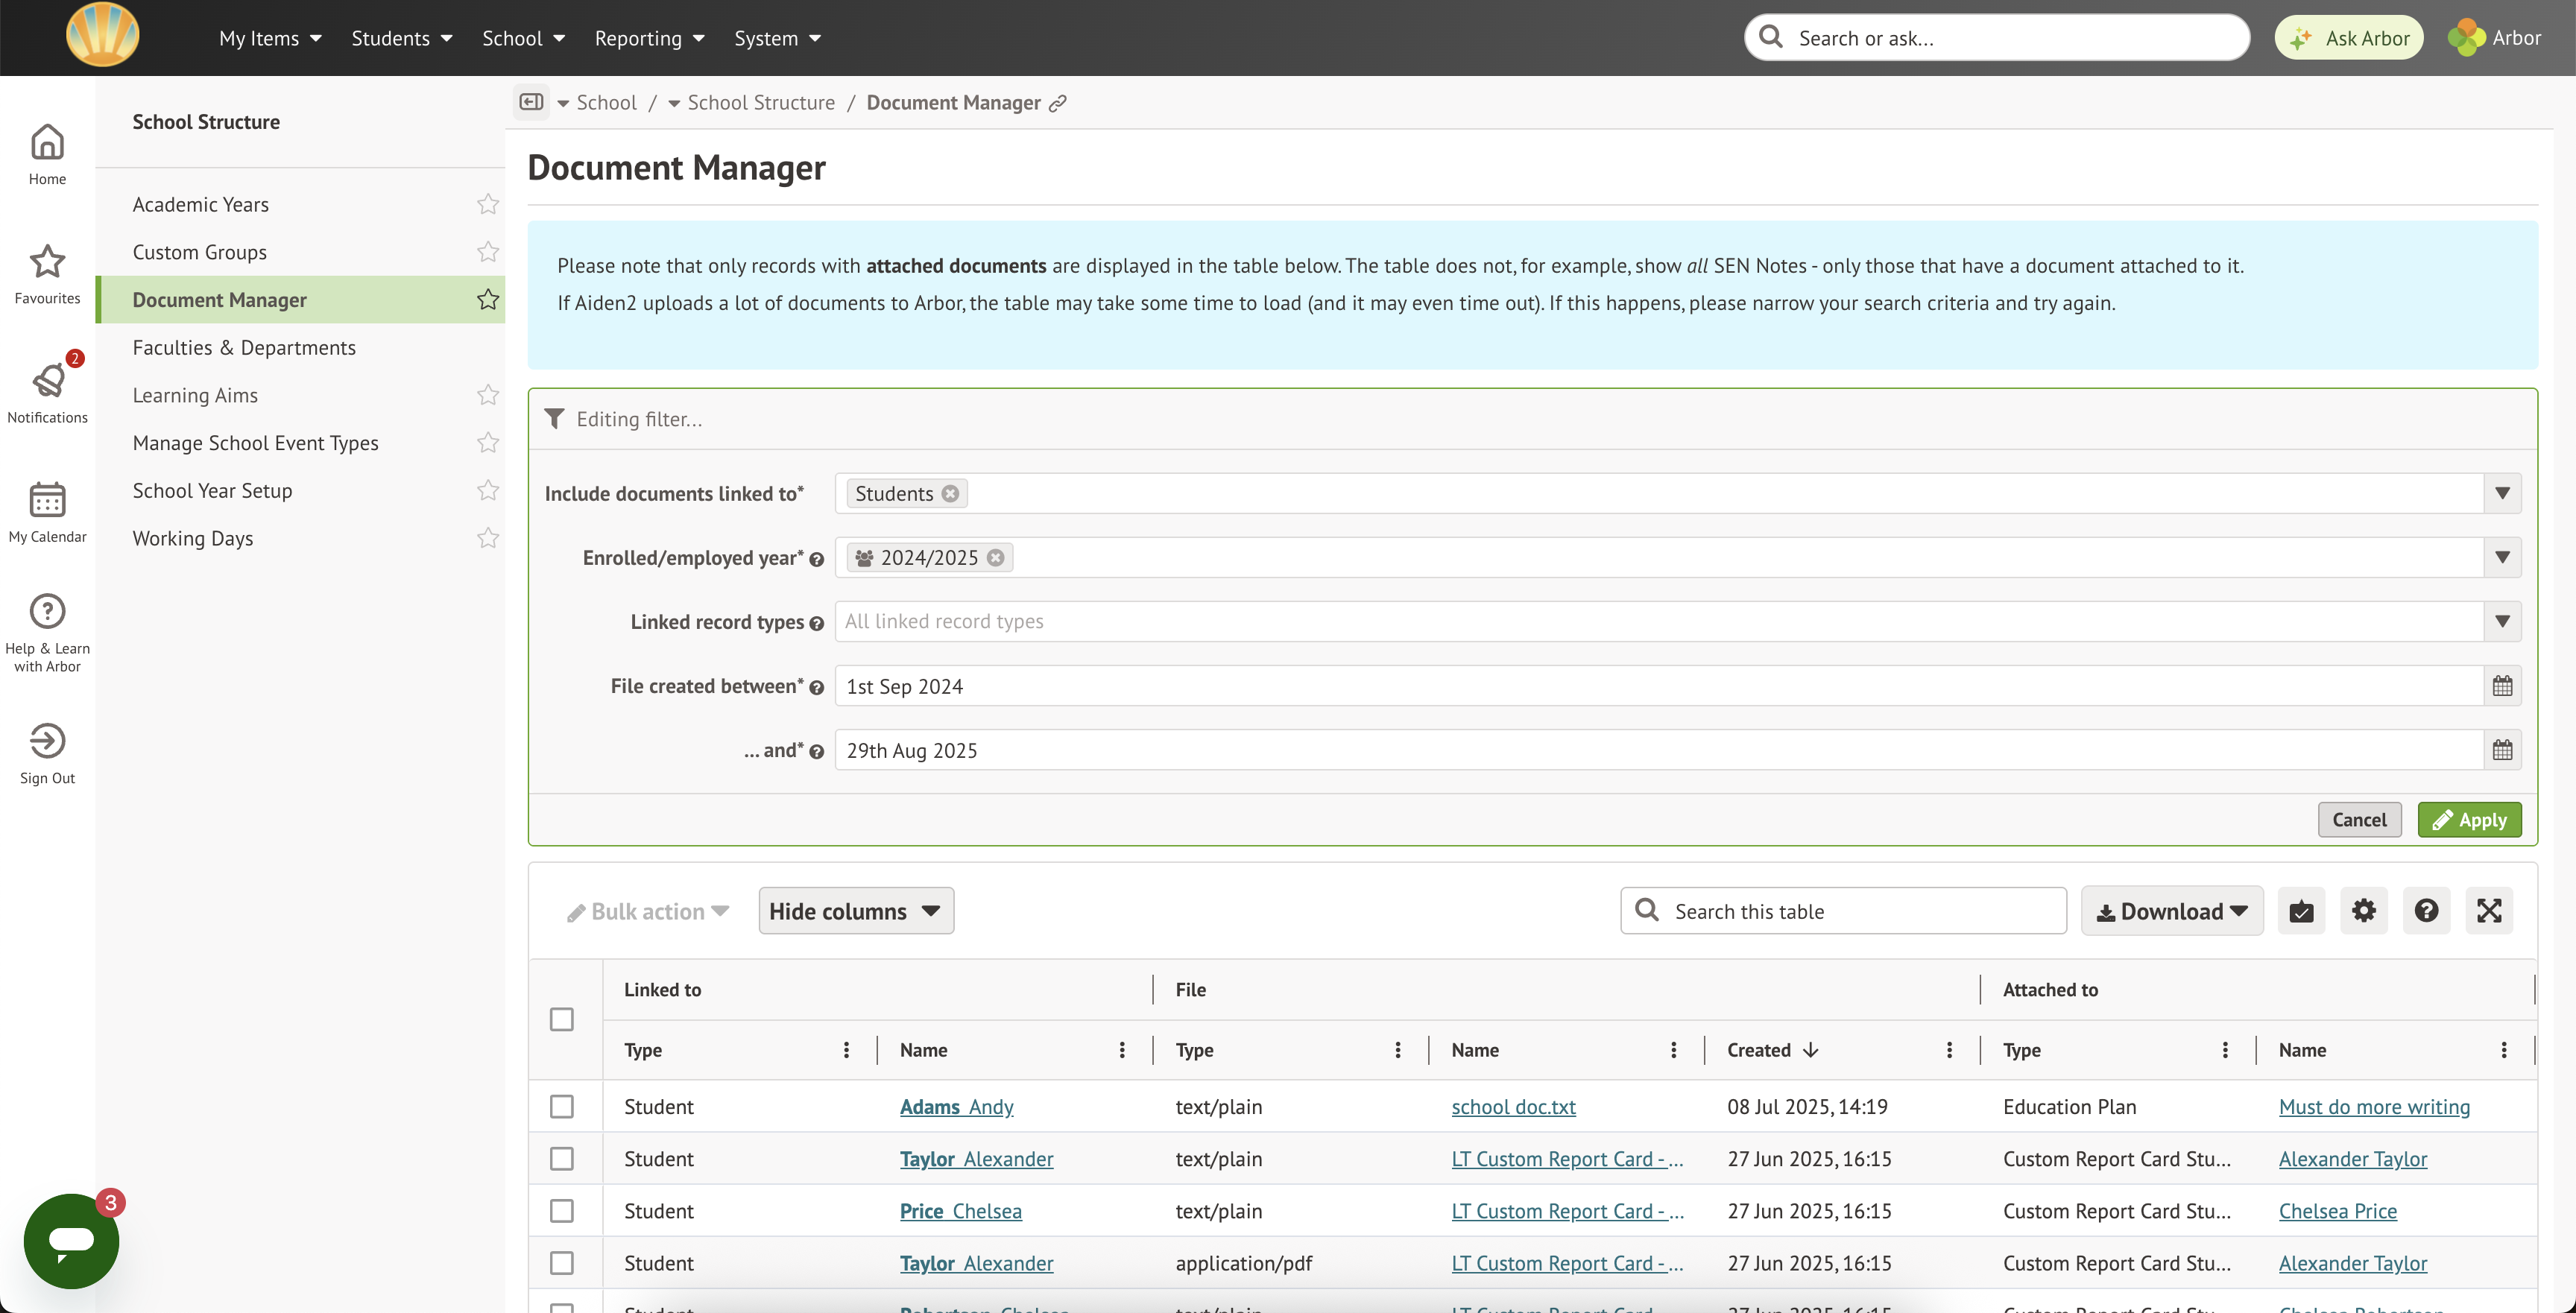
To access this page, go to School > School Structure > Document Manager.
From this page, you can manage all documents that have been uploaded to Arbor. Only records with documents are shown in the table. For example, you won’t see every SEN Note here, just the ones with a file attached.
If a large number of documents have been uploaded to Arbor, the table might take a little longer to load. If it times out, try narrowing your search filters and then run the search again.
Filtering
Use the filters on this page to narrow down the records shown. This is especially helpful if you’re looking for a specific type of document or want to focus on a certain group of people.
The available filters are:
- Include documents linked to – choose whether to see documents linked to Students, Staff, Guardians or Educational Institutions.
- Enrolled/Employed year – show only documents linked to students (and their guardians) enrolled, or staff employed, in the selected year(s).
- Linked record type – pick the type of record you want to see documents for. Leave blank to include all record types.
- File created between / and – set a date range for when the document was uploaded. Note that this is the upload date, not the date the underlying record was created.
Bulk Actions
You can carry out two bulk actions from this page:
- Download (zip) – Creates a zipped folder containing the documents you’ve selected in the table. It may take a couple of minutes to generate. You’ll get a notification once your folder is ready to download.
- Delete – Removes the selected documents from Arbor. This does not delete the underlying record they’re attached to. You’ll still need the correct permission for the type of record before you can delete a document.
Student and Staff Profile > Documents
From a student or staff profile, go to Documents in the left-hand menu.
You can see and manage all the documents that have been uploaded to that person’s record. The table only shows records that actually have a document attached. For example, you won’t see every SEN Note, just the ones with a file linked to it.
You can open, download or delete documents here. The bulk actions are the same as in the central Document Manager, so you can select several documents to download as a zip file or delete in one go. Deleting a document only removes the file itself, it does not delete the underlying record it’s attached to.
Permissions work in the same way here as in the central Document Manager. You’ll only see documents if you already have permission to view the type of record they’re attached to. For example, medical documents will only show if you have permission to view medical records in Arbor.
There aren’t any page-level filters on these profile pages. If you want to narrow things down, we’d recommend using the column filters built into the table instead.
To delete a file from here, tick next to the document, click Bulk Action, and then Delete.
Key things to note:
Report Cards
This feature currently only supports Custom Report Cards and External Report Cards, as these are stored documents in Arbor. Standard and Long Report Cards work differently because they’re generated each time you download them. To review all report cards for a student, go to the student profile and select Reports from the left-hand menu.
Behaviour Incidents
If a behaviour incident has a document attached and it only involves one student, the file will appear in that student’s documents area and in the Document Manager for that student. If multiple students are linked to the incident, the attachment will be stored under the school’s documents. In that case, you’ll only see it by going to the Document Manager and filtering by Education Institution.
Attendance Certificates and Timetables
These documents won’t appear in the Document Manager because they aren’t uploaded or stored in Arbor. Instead, they’re generated fresh each time you download them. This means there’s no “file” sitting in the background to manage, so you’ll always get the most up-to-date version directly from the relevant area of the system.
Adding documents
Typically, documents in Arbor are attached to notes or records as an attachment. So you add documents to a profile and the document manager:
- Creating a record (like an absence record or qualification) or a note
- Then, attaching the document to that note or record
Comments
Article is closed for comments.