Adding conditional formatting to a column allows you to colour code fields in that column based on certain criteria. The example below will walk through adding conditional formatting to reports on attendance data, but you can use it on any field you can base filters on, in any report type, including calculated fields!
This feature is available on both School and MAT MIS sites.
Permissions
To create your own custom reports or edit reports shared with you, you will need the School: General Admin: Export Data permission.
The amount of data you are able to view will also depend on your permissions - see more information on how this works here: Who can access Custom Report Writer reports and fields?
If you need to give someone permission to create reports or report on certain items, you can follow these instructions.
When can I add conditional formatting?
You can add conditional formatting when creating a report, or when editing a report!
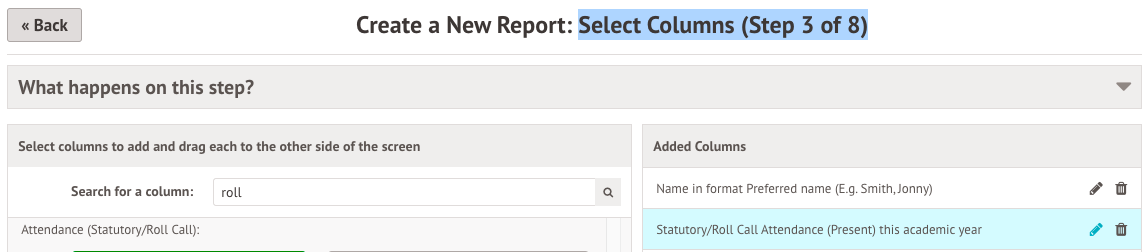
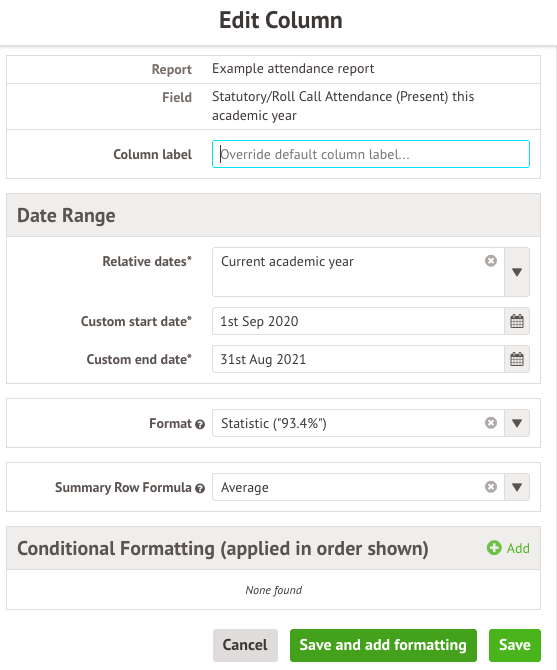
When creating a report, you can add conditional formatting when adding columns in Select Columns (Step 3 of 8). Just click the pencil icon once you've dropped your columns.
When editing a report, click the pencil icon to edit or add conditional formatting.

How to use conditional formatting
Editing conditional formatting
In the Conditional Formatting section in the slide over, you'll see any existing conditional formatting applied.
Click into the formatting to edit it or delete it.
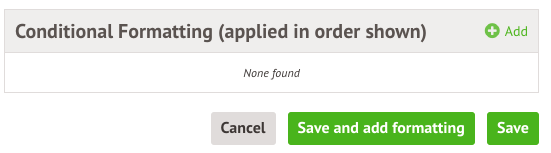
Adding new conditional formatting
In the Conditional Formatting section in the slide over, click Save and add formatting.
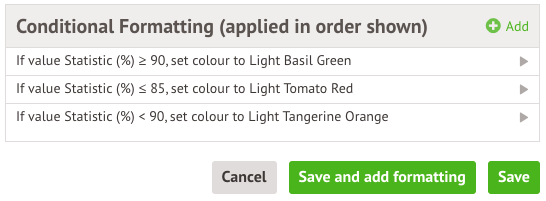
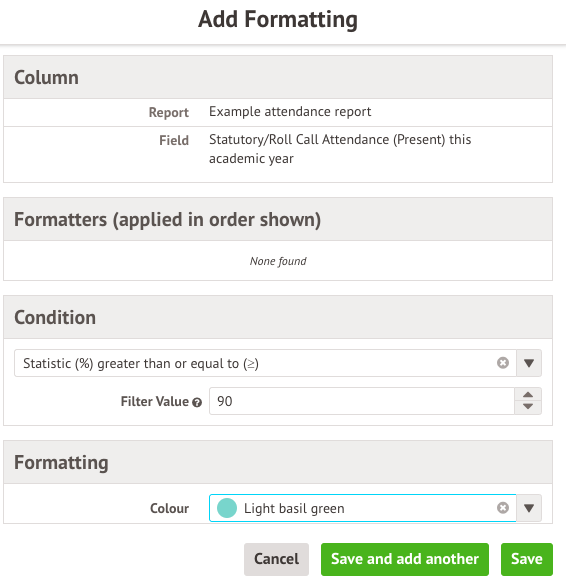
Choose a condition for your formatting. In the example below, this will colour any student's attendance that is 90% or above in green.
Click Save if you only want to add one condition (such as marking empty fields in red), or click Save and add another.
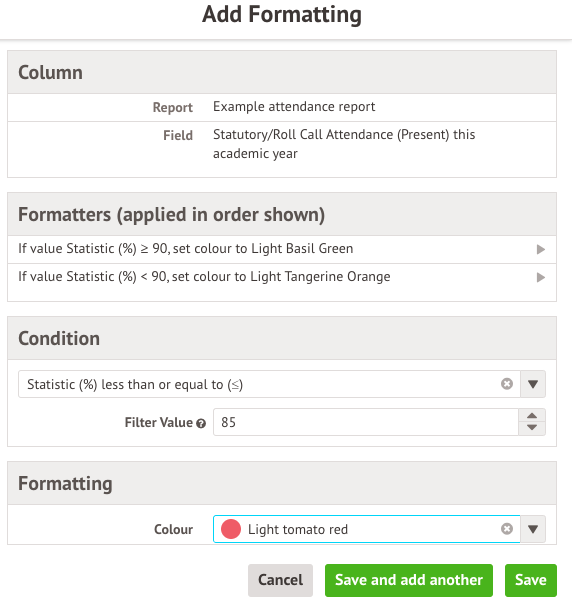
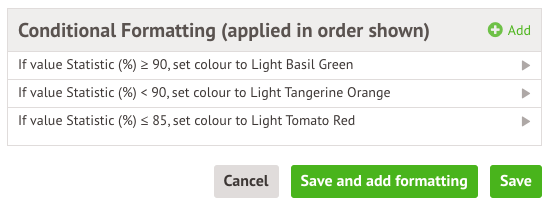
In this example, I've set up three colours. If you set them up in the right order, your report will be colour-coded based on your conditional formatting.

My report isn't colour-coding correctly
In Arbor
If your report is not coloured correctly, this will be because of the order you have set up your conditional formatting in. In the example below, you can see that Yvette should be coloured red.

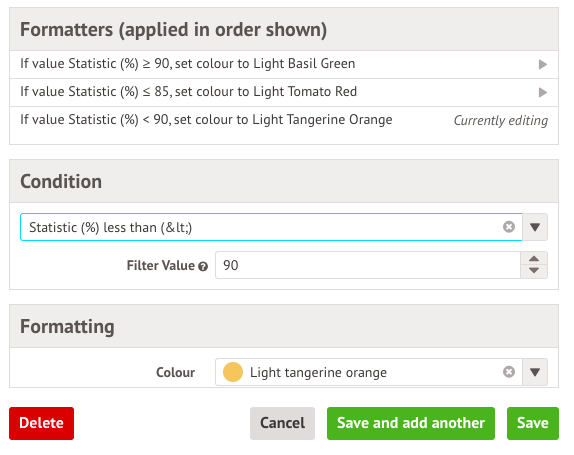
If you edit your report and click the pencil icon next to the report column, you can check the order of formatting.
The order of conditional formatting applied depends on the order the formatting was added. Here, the formatting of Orange was added after the formatting of Red, so it has overridden it.
You'll need to click into the conditional formatting to delete them, and set them up in the right order.
In downloads
Please note that the colour coding will not apply if you create a Live Feed of your report.
Can we import reports with conditional formatting?
Please note if you follow this process to import a report with conditional formatting, the conditional formatting will not be applied: Importing a Custom Report Writer template or exporting a template to send to another school
This is because conditional formatting references column identifiers in the background, which is different for each site. Once you import the report, you'll need to set up the conditional formatting again.
Comments
Article is closed for comments.